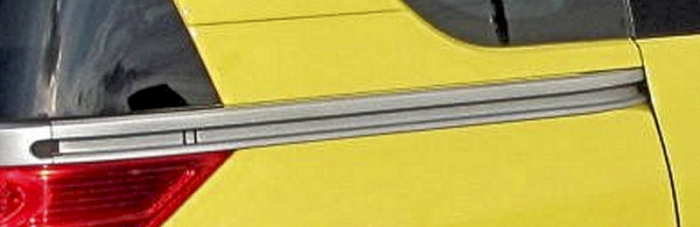
Instead of traditional hinges, the doors are supported by ROLLERS rolling along three GUIDE RAILS.
The upper roller rarely gives any trouble.
If one of the tyres on the middle or lower rollers becomes worn or split then bear in mind that the load is taken mostly by the centre roller. Check by fully opening the door and watch and listen to the rollers rotating as the door closes.
Keep the guide rail clean - do NOT oil/grease them as they need friction to rotate. Should the paint get wrinkly or worn, use a flat file and emery paper,and gently rub down the lower running surfaces until they are smooth. Up to you if you repaint them; I don't myself.
Most problems seem to be with the centre roller. I've not heard of many problems with the lower roller - but with the door open you might grovel on the floor and look upwards to see if the lower guide rail is clean and clear of obstructions.
Be careful with fingers at all times and make sure you have all remote key fobs in your care so no-one else can "help" by moving the doors whilst your fingers are in there.
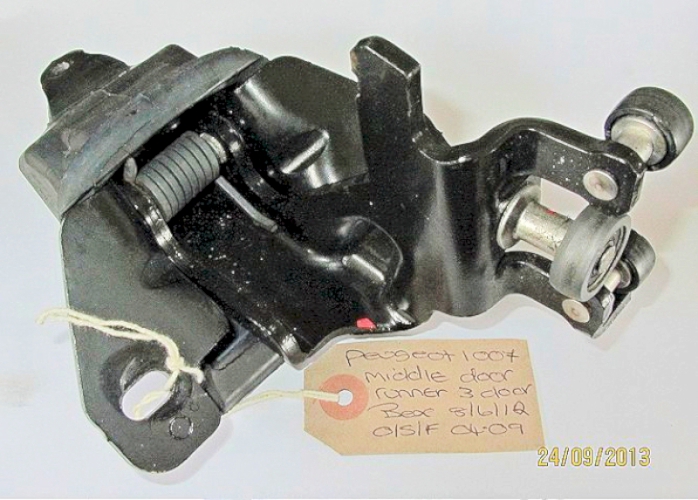
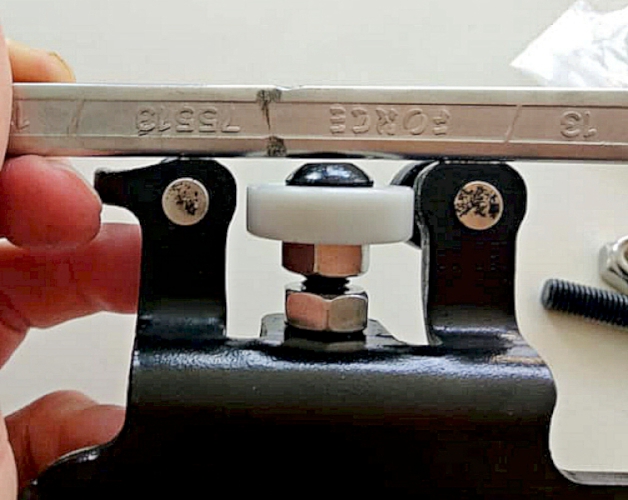
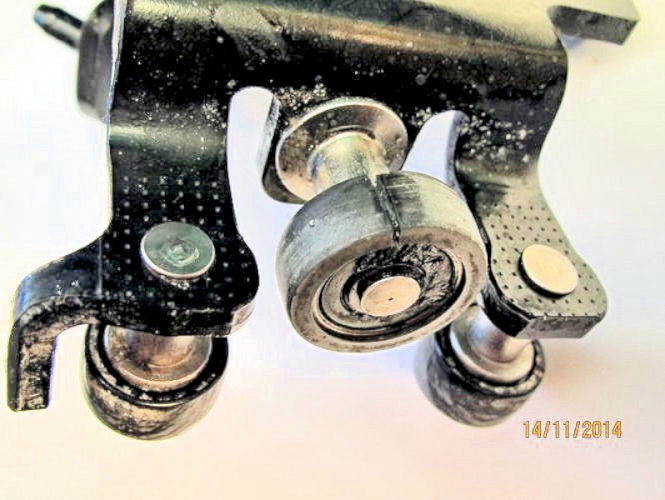
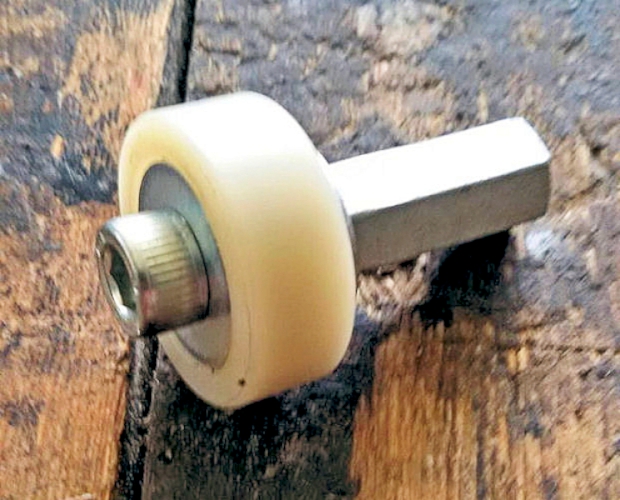
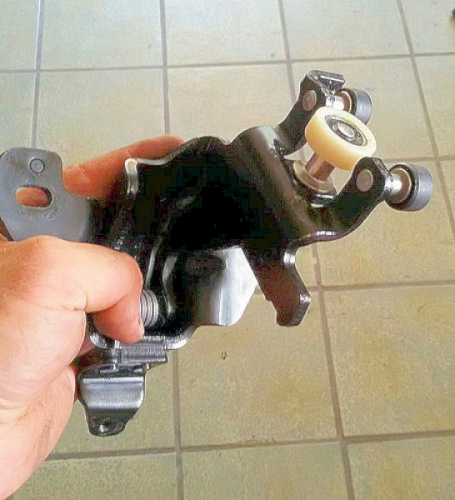
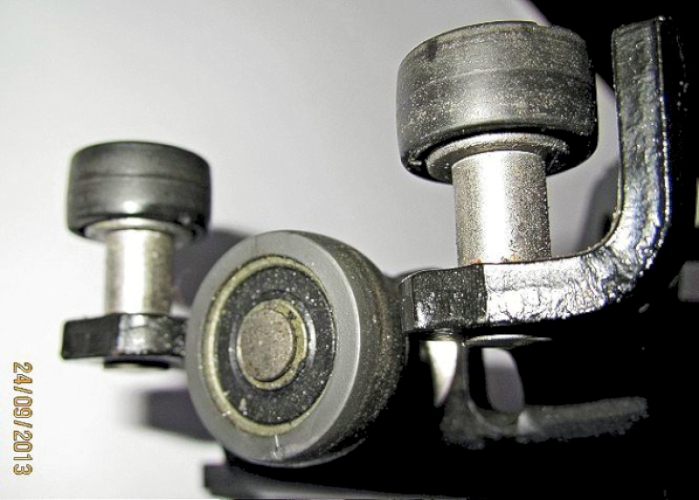
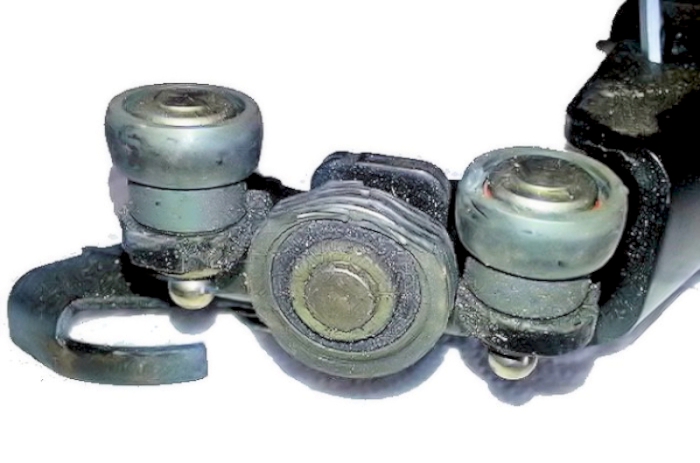
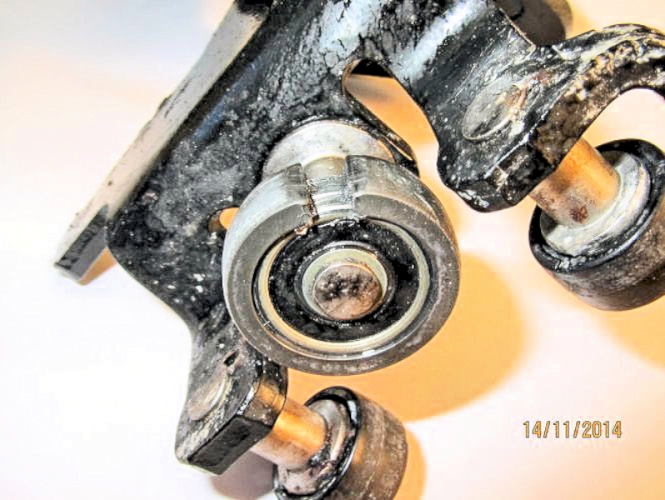
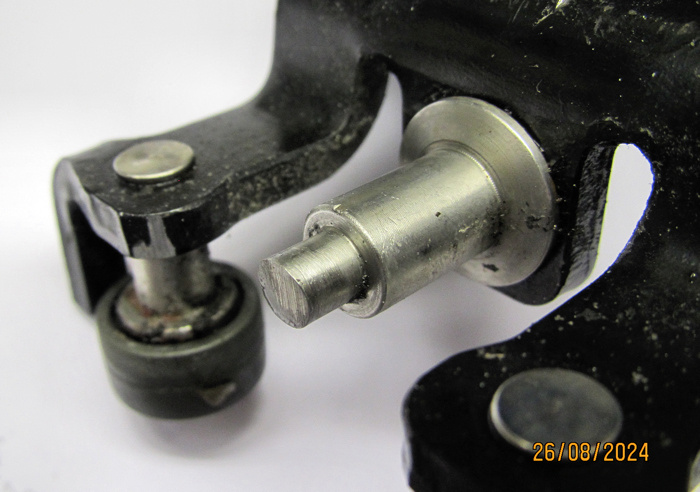
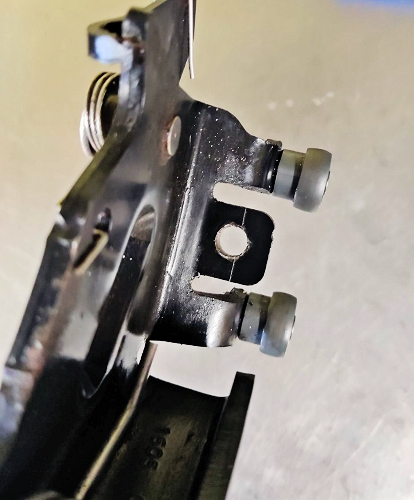
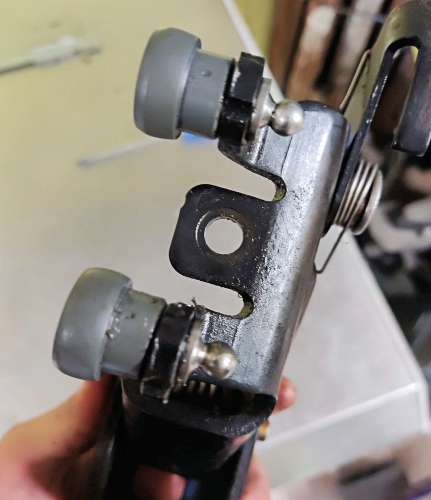
This is the hinge assembly that runs on the centre (middle) guide rail; the larger roller takes more than half of the load of the heavy door, and is usually the first to fail.
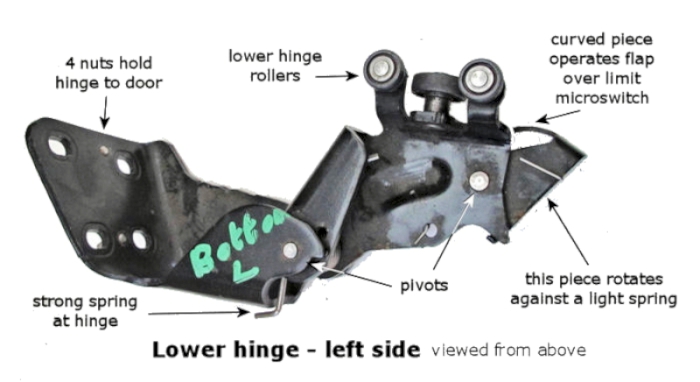
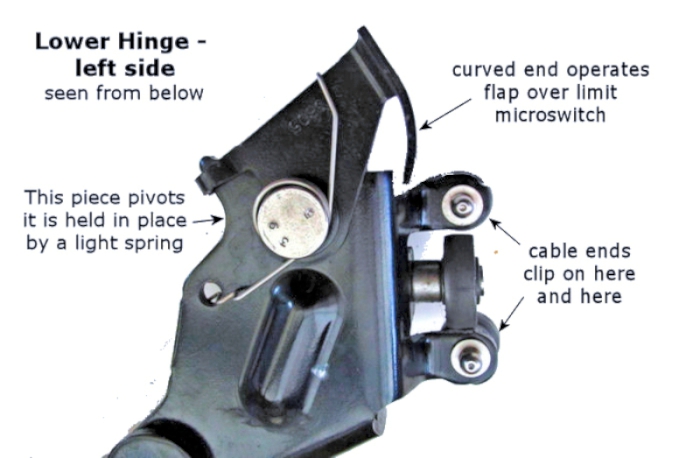
The lower hinge assembly supports the door and also transmits the movement of the open/close motor-driven wire cables to the door.
I oiled the centre roller bearings on one car and the vital large roller and the paint on the guide rail running surfaces failed on both sides about two years later. Possibly some oil had strayed onto the roller and guide surfaces though I thought I had cleaned them off.
Worth repeating - clean off any surplus oil and dirt from the guide rails as the rollers need friction (not lubrication) in order to rotate - if they don't rotate they will quickly form a flat and a knocking noise as the door moves.
. . . . unless you want your rollers to look like this: . . . (a rare occurrence)
this was a roller that ran in the lower guide rail (not mine!). Possibly the bearing had seized as this roller is very low down and may have seized over the years.
At the moment, (2015) complete new middle hinge assemblies, part numbers 9033S8 (left) and 9033S7 (right) are available from Peugeot for about £78 including VAT each. In 2018, these parts have increased £106 including VAT
Both middle door rollers on the green car (50,000 miles) had split their nylon/rubber running surfaces. The original roller assemblies had a third bolt under the door liner so the door liners have to come off early cars, but this is fairly straightforward if necessary.
Newer middle roller assemblies only use two mounting points so will be much quicker to change next time as the door liners won't have to come off.
Once the hidden bolt under the door liner has been removed, the old-style hinges can be refitted without removing the door liners as they are OK without the third bolt.
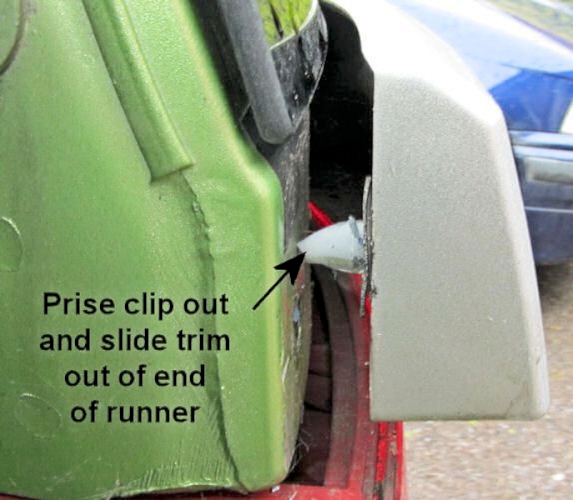
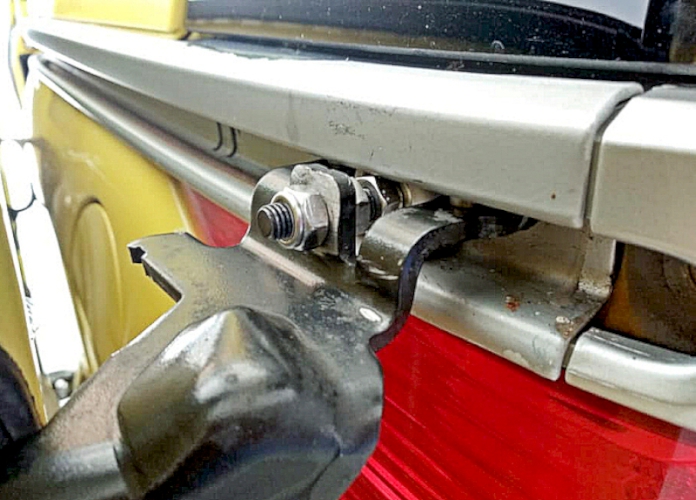
remove the corner trim by removing the Torx30 bolt and unclipping as shown
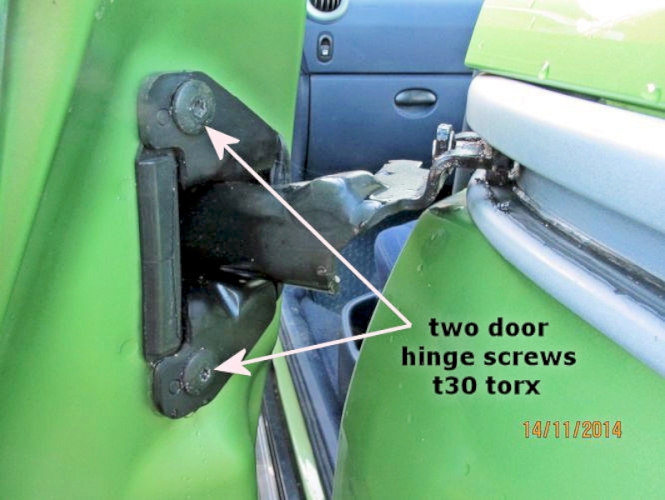
These are the main roller assembly mounting bolts; they are Torx30 headed M6x1.0 bolts.
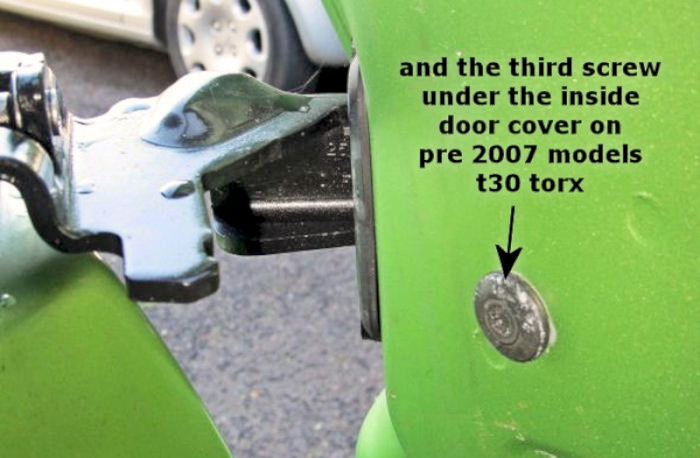
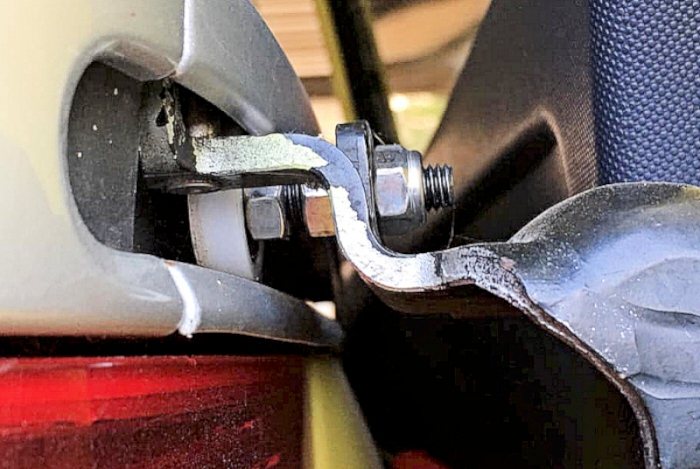
This is the third T30 bolt (2005/6 models only) which means the door lining has to come off to remove.
Support the door as the central roller you are removing takes the full weight of the door.
Make this a firm support as the door may try to pivot away when you remove the central roller; I have the dent to prove it. Better to support about two thirds way along the door rather than at the back as shown here.
After removing the three bolts (two on later cars) the hinge with rubber seal pulled out against spring pressure (careful with fingers) and slid off the guide rail.
The centre hinge can be tricky to refit:
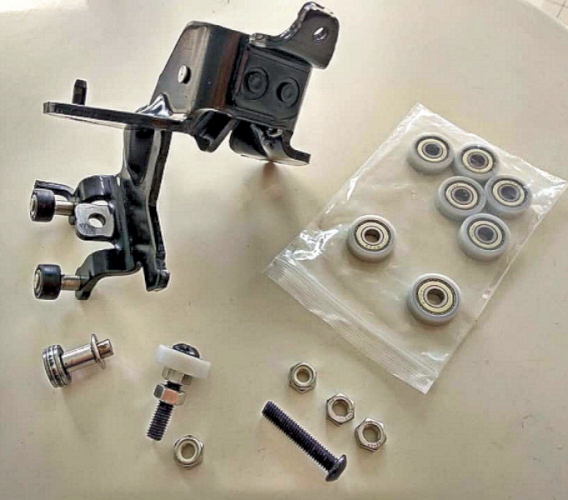
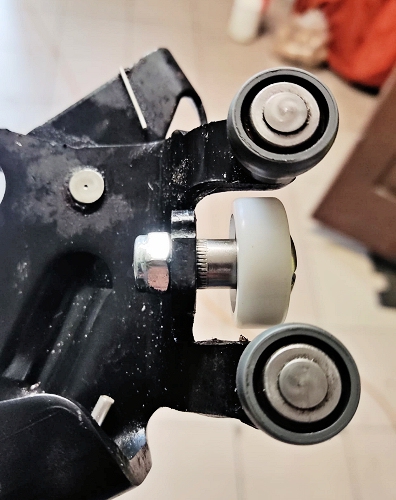
New hinges were no longer available by 2024, I fitted a new tyreless roller to an old hinge this way:

The roller is
available on Amazon: (2023)
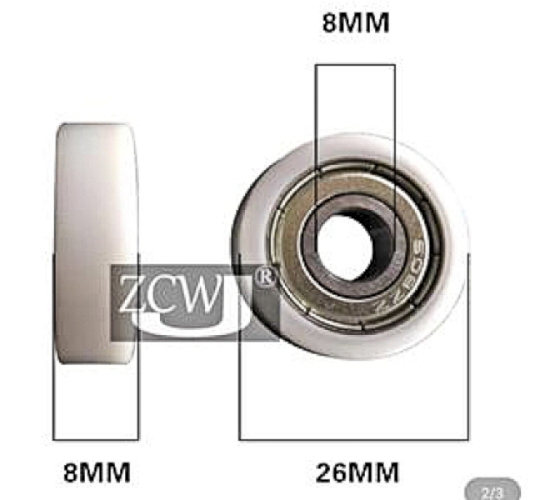
"Sourcing map 628-2RS Deep Groove Ball Bearings 8mm x 24mm x 8mm Double Sealed Chrome Steel
P6(ABEC3) 2pcs"
NOTE: these bearings have Outer Diameter: 24mm; Inner Diameter: 8mm; Width: 8mm. They have no "tyres" and appear to be lasting well. The sleeve is a simple spacer to fit the larger bearing on to the resulting stub. In practice, it rolls smoothly, with a slight, but not obvious, harshness.
The sleeve is
available on Amazon: (2023)
"PATIKIL M6 Stainless Steel Spacers, 5 Pcs Metal Spacer Stainless Steel 6.1mm ID x 8mm OD x
6mm L Stainless Steel Spacer Screw Standoff Round for 1/4" or M6 Screw Bolts"
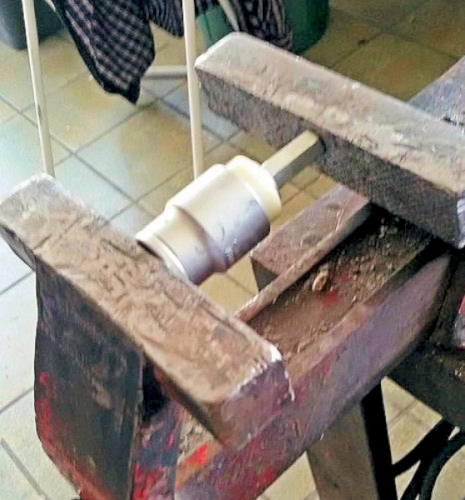
First clean the hinge removed from the car (or a second-hand "spare" hinge).
Then grind off the end of the spigot holding the faulty roller and remove the old roller (this is the only slightly difficult bit).
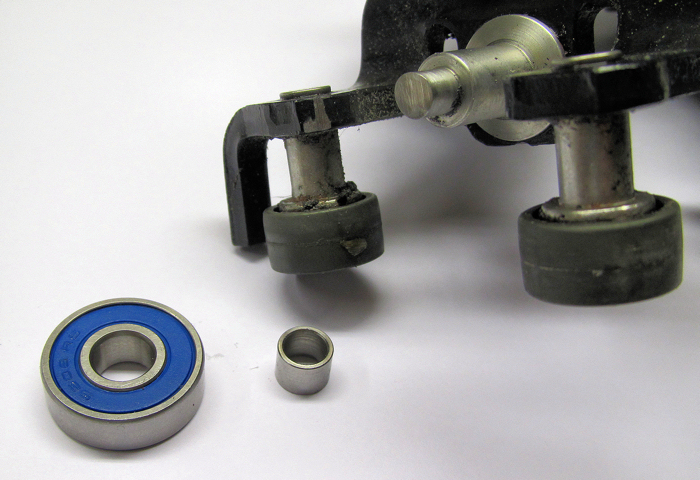
This shows the sleeve and bearing ready to fit onto the spigot.
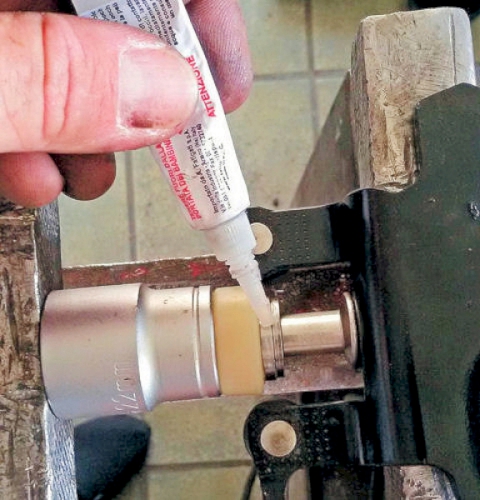
You are about to glue the bearing onto the spigot, so emery paper and clean the touching surfaces.
Sparingly glue the sleeve and bearing onto the spigot (I used normal Araldite, which is strong and well-proven). Allow the glue to set (24 hours for Araldite) and refit the hinge assembly to the car.

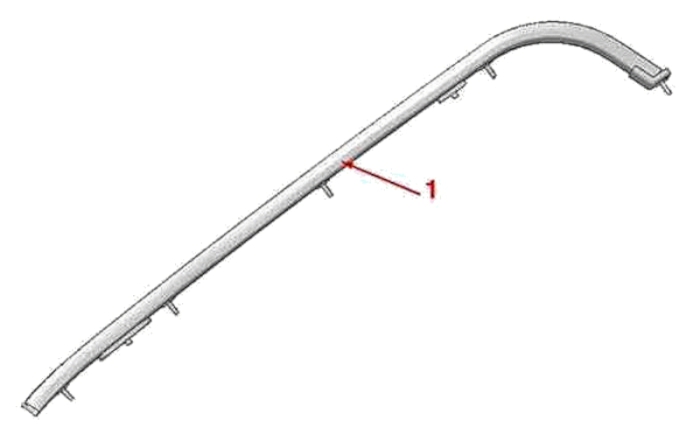
The centre guide rail is item 26 on this drawing
From what I can see on the drawings; the nuts holding the rail have to be taken off from the inside (which means removing the interior trim).
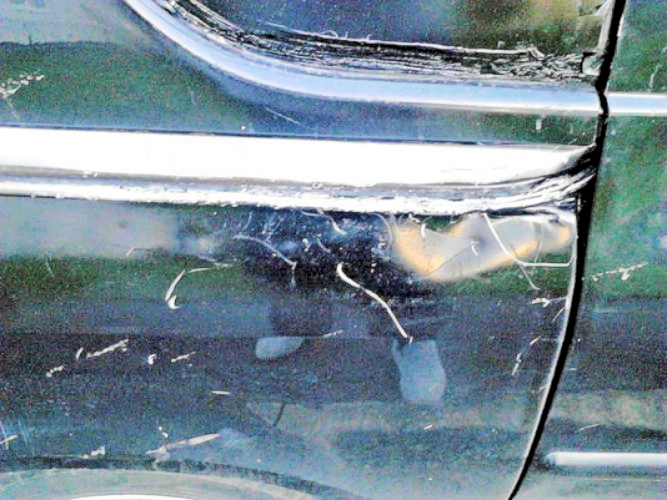
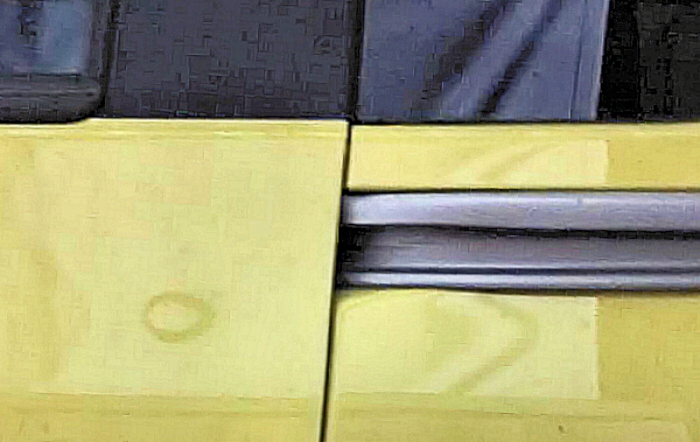
This is a really nasty dent; body repair will probably mean welding in another section and replacing the guide rail.
Remove the centre rollers first and support the door partially open.
The guide rail is held in place by studs on the back of the guide - which means it has to come off by pulling outwards.
Note: this picture shows the inside of the left-hand body.
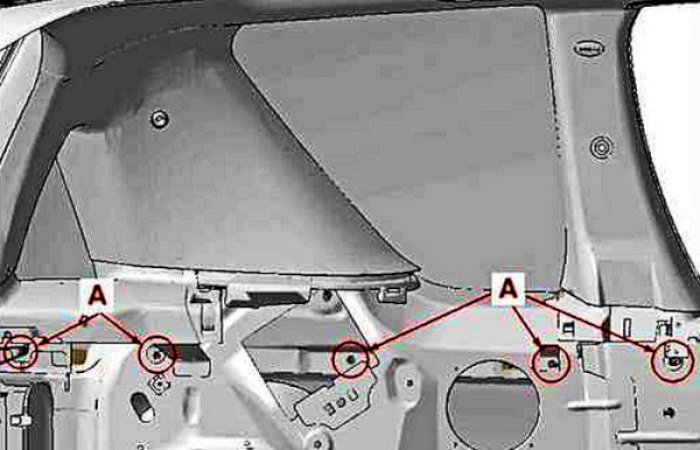
To remove the guide rail it is necessary to take out the internal trim and speaker to get to the five M6 securing nuts.
The nut holding the seat belt unit might also need to come out as it in the way. NEVER open the side with the spring (bulged) to loosen it when reinstalling (otherwise you could end up buying a new seat belt!) but open the opposite side and push open a locking mechanism then the belt slackens easily.
At the moment, (2015) complete new lower hinge assemblies, part numbers 9033Q3 (left) and 9033Q2 (right) are available from Peugeot for about £90 + VAT each.
This is a spare lower hinge assembly
I haven't changed one myself (yet)
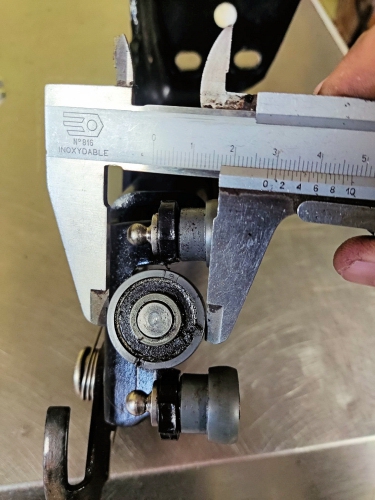
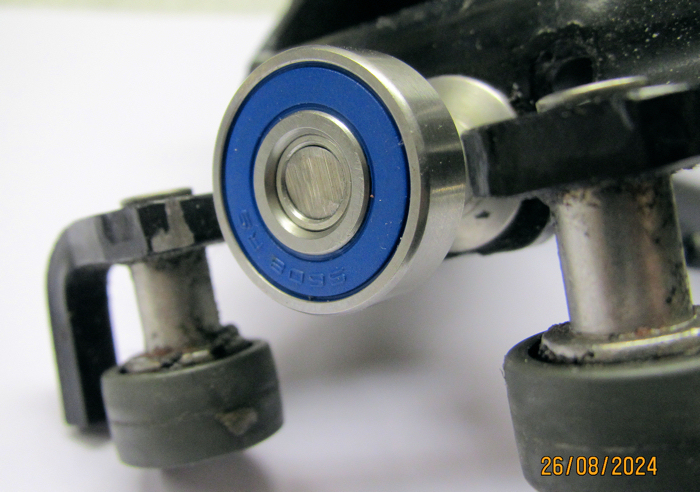
Diameter overall = 28mm
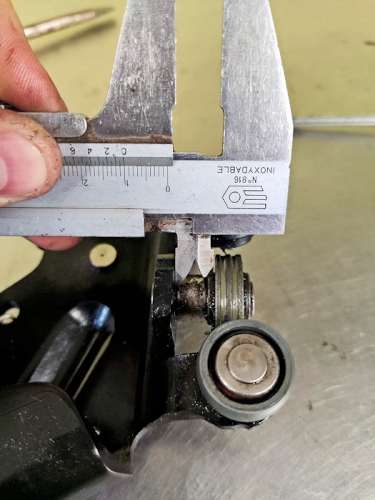
Spaced off the support by 10mm
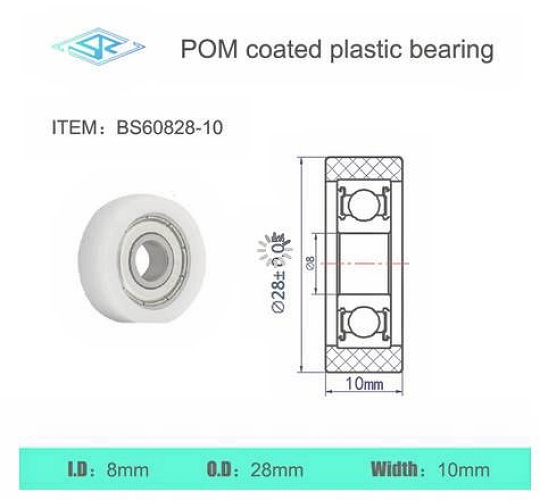
This is the size of bearing you are looking for - BS 60828-10
After drilling out the rivetting of the bearing support, you are left with an 8mm hole
Note that the material is very tough and you may need to use a grinding wheel

File down an 8mm rivnut to 10mm length to act as a spacer

Locate the bearing on the 8mm bolt and tighten with the rivnut
and secure to the hinge assembly with a shakeproof nut
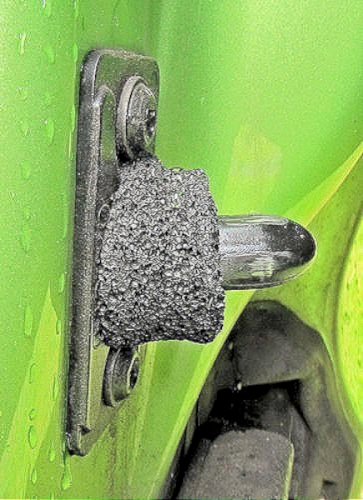
When closed, the door is located by three spigots which locate into sockets.
This one is low down on the "B" post
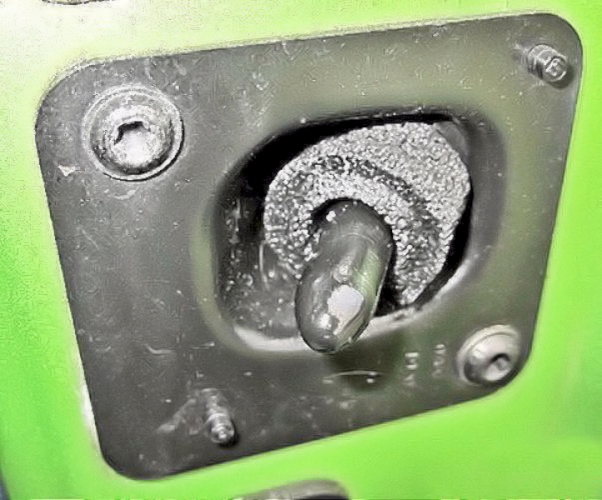
The one above and this one at the front of the door are fitted with a soft spongy washer to take up any slack and minimise rattles.
this spongy rubber is quite critical as when the door is closed, it compresses the washer and prevents the spigot rattling around in the fixed location guide
If the spongy rubber has disappeared over the years, I have used spongy dishwasher pads and cut them up to fit. Not ideal but better than nothing!
The third spigot (not shown) is at the front of the door about eye level and fits into the matching slot on the A post.