Auxiliary & Cam Belts
1.4 petrol
Replacing the 8 year old cam belt on the 2005 1.4 8-valve petrol:
At just 26,000 miles the belt itself was perfect; but the idler pulley was quite stiff (odd, but possibly the grease hardening).
The water pump was lumpy (not loose) as I turned it - so needed changing. The alternator/compressor idler was loose and greaseless.
My workshop requires a fine sunny day with no wind - we had a few hot dry days in August 2013!
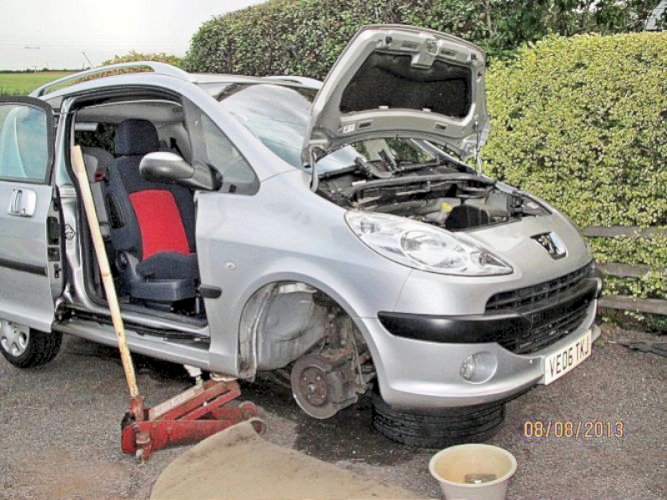
Jacking and removing the splashguard was the same as on our other 1007:
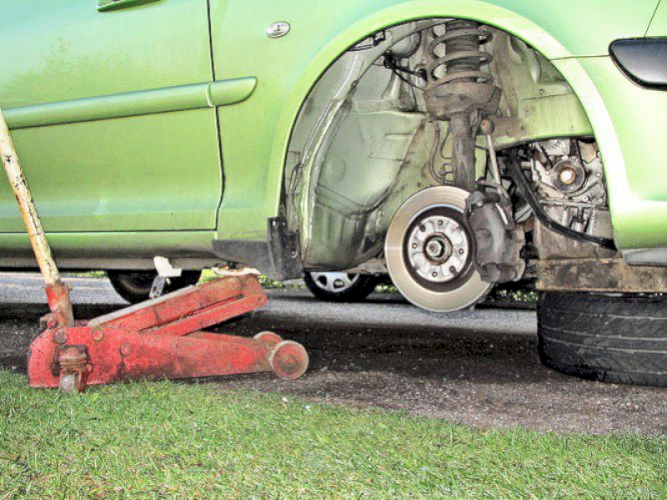
Securely jack the car up and support it; remove the driver's side wheel
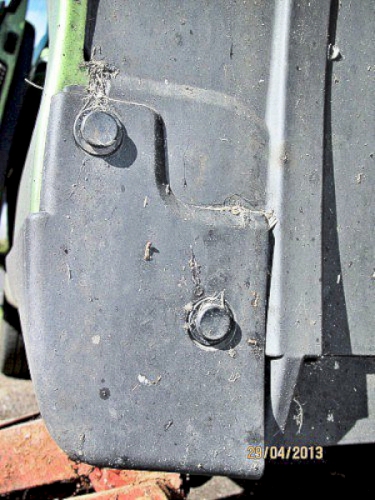
The Splashguard is held in place by eight plastic push-pin rivets and one 10mm bolt at the front skirt
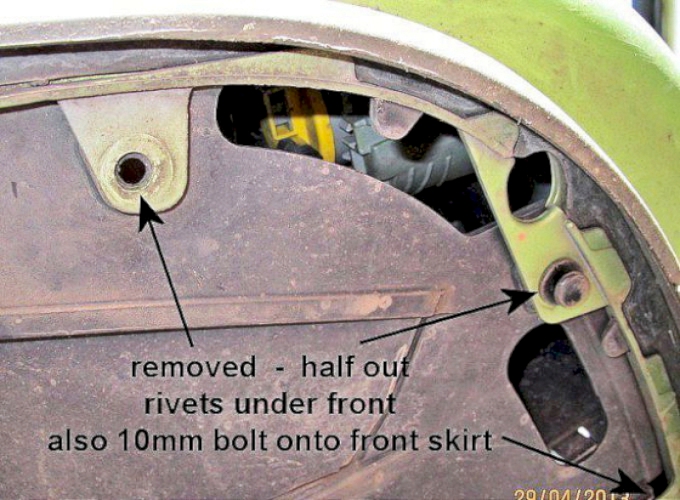
underneath view of front section of splashguard which is supported by two rivets and a bolt.
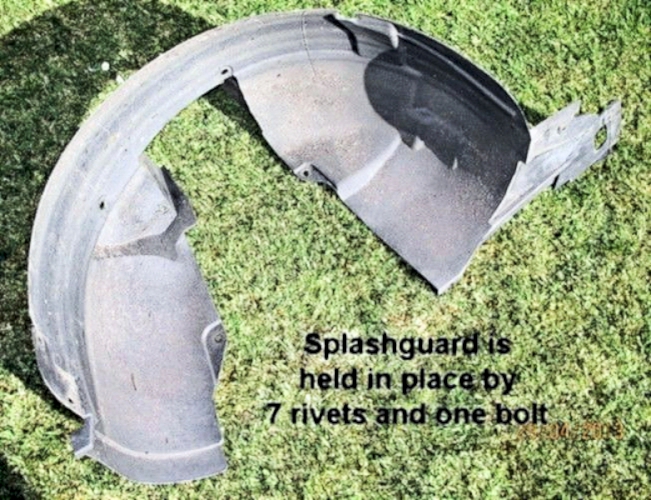
The splashguard is a little unwieldy but very light
now back to the 1360cc engine:
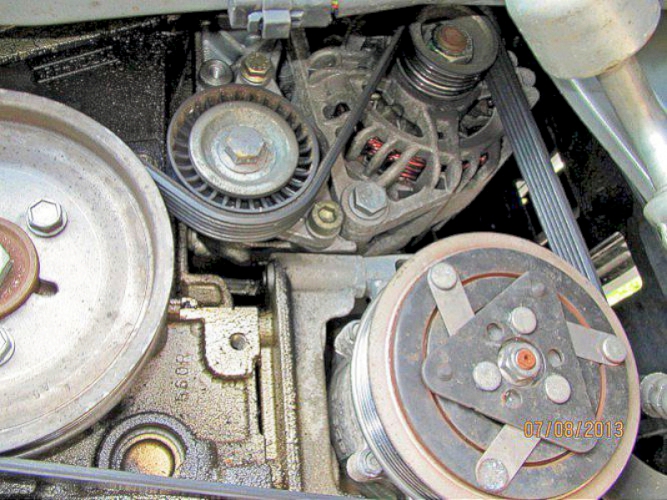
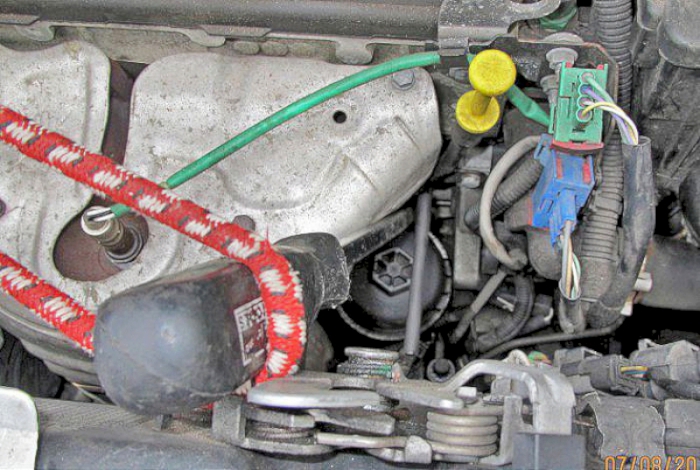
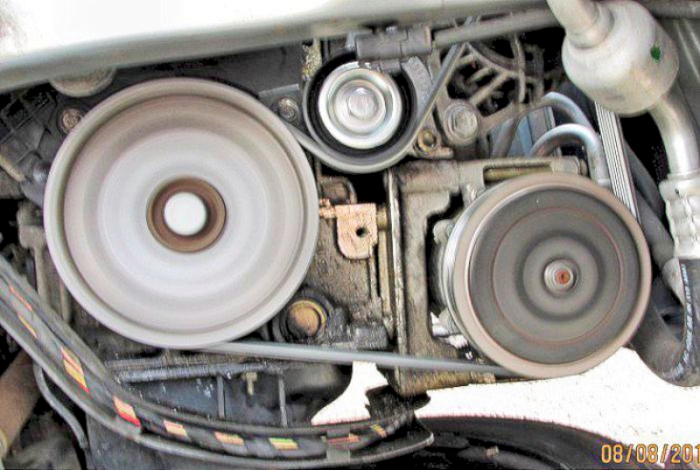
The auxiliary belt drives the a/c compressor and alternator; I found the idler pulley was dry and rattling.
note that the alternator and air con. compressor are fixed and belt tension is maintained by the sprung idler pulley
Release the pressure on the auxiliary belt (by turning the central bolt) until the belt will slide off.
Check the shock absorbing rubber drive in the crank pulley by marking Tipp-ex or chalk across the two parts (not done here). If the marks move apart then you can see at once.
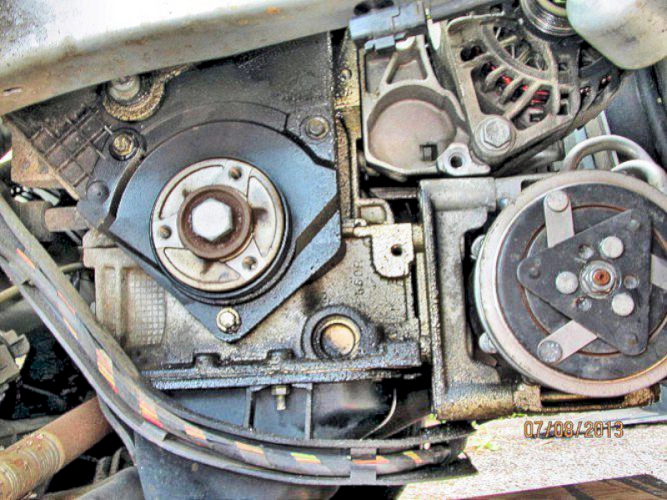
With the belt off, undo the three 10mm bolts and remove the crank pulley
Remove the auxiliary belt tensioner (one 13mm bolt and one allen key)
again, pictures from the 1.6 but the 1.4 is very similar.
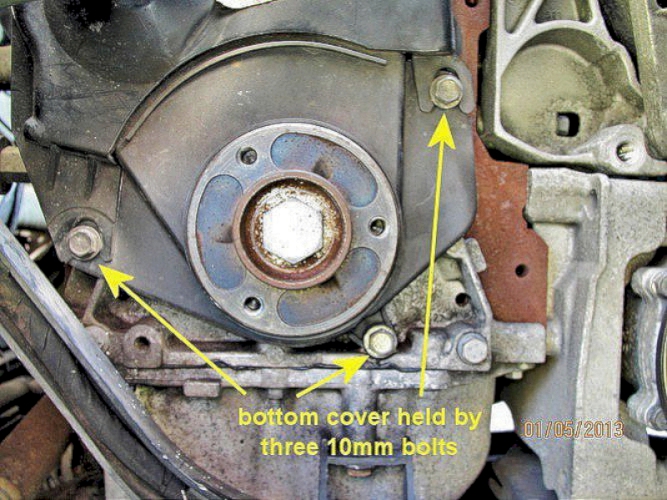
Remove the lower cam belt cover (three 10mm bolts)
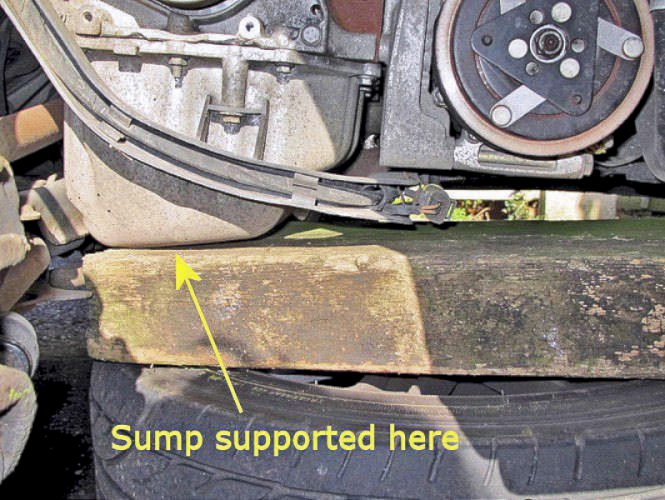
Support the engine securely to take the load off the engine support bracket - I used a fixed floor support and raised/lowered the car slightly on the jack
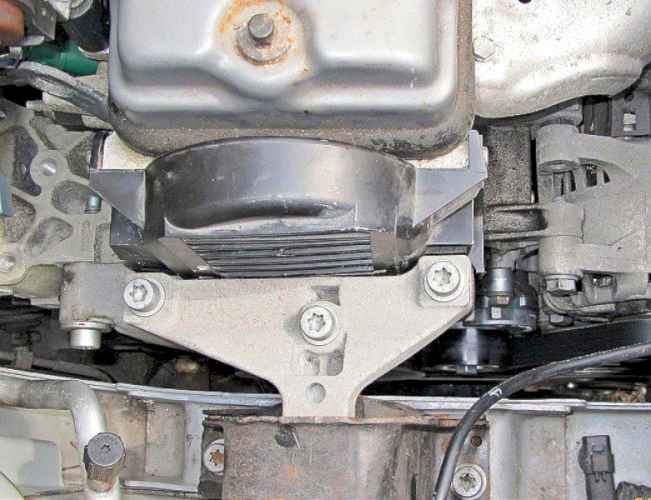
Remove the engine support bracket - five vertical T50 bolts
- and the three horizontal T50 bolts holding the mounting onto the engine (there isn't enough room to get them all the way out)
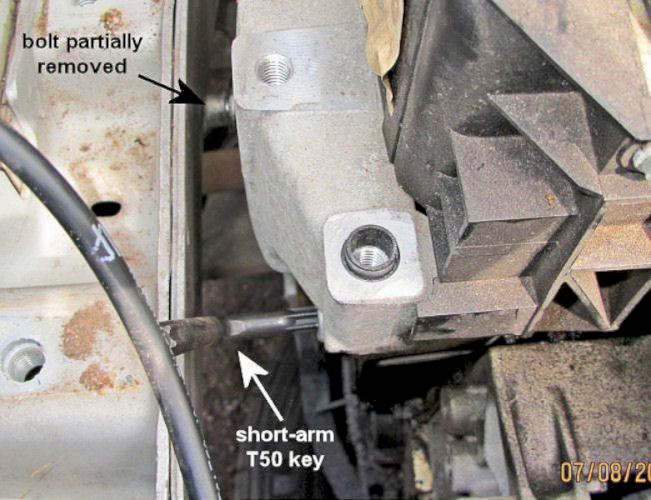
- these three T50 bolts are very close to the chassis so no room for a conventional socket set and I had to use a short-armed L-shaped T50 torx to remove (and subsequently replace) the bolts. A piece of pipe slipped over the end of the L-shape increases the leverage.
A total of eight Torx T50 bolts have to be removed to take the mounting off - you will need good tools as they are done up very tightly.
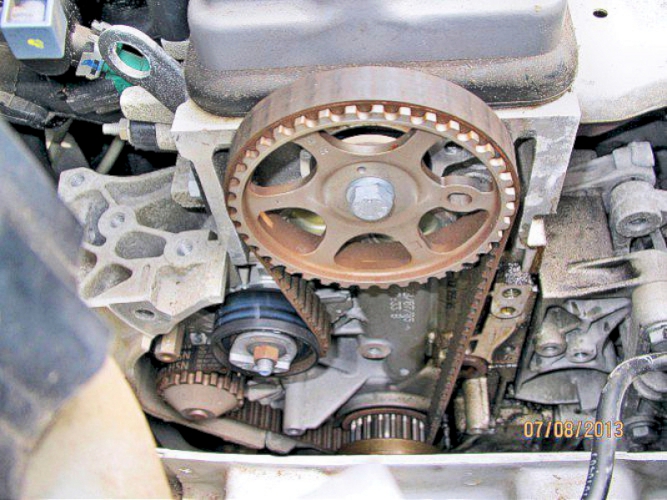
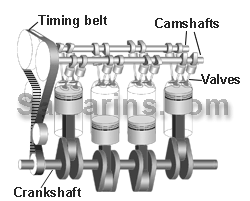
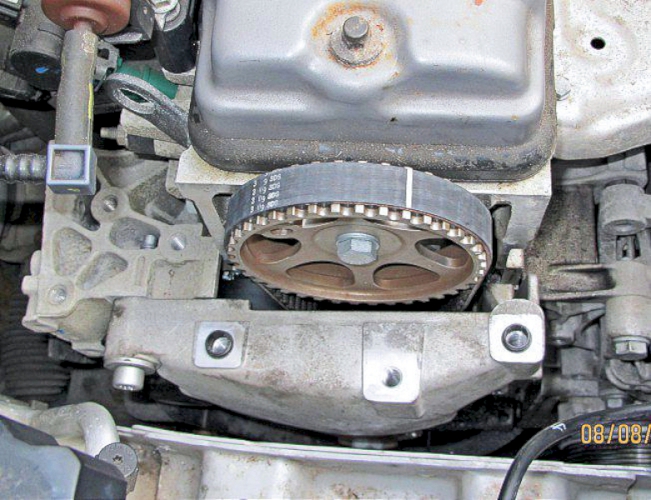
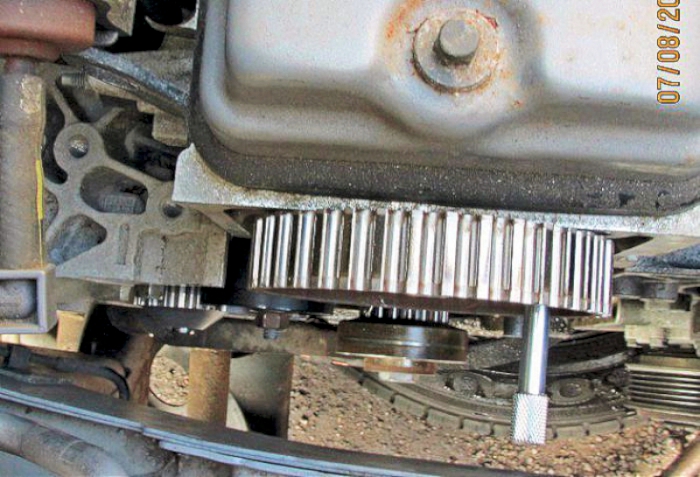
Remove the top cam belt cover (two 6mm screws and lift straight up) - and here is the cam belt
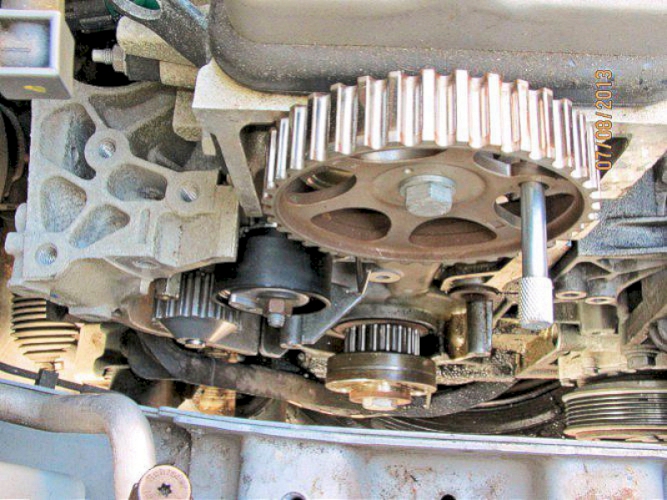
Turn the engine (22mm socket on the crank bolt) and pin the crankshaft and camshaft so they cannot move. I used a Sealey VS4935 petrol engine timing kit which has the required holding tools.
the special tool will slide in nicely to lock the crankshaft at TDC no 1 cylinder

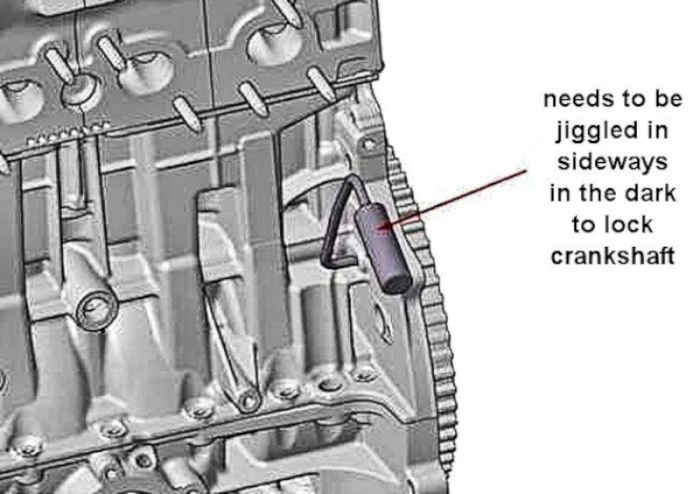
Bit of a fiddle in the dark depths, but use some patience (and maybe a bright torch and long lever to help)
and with a bit of steady pressure (elastic or a second helper) on the lever, the special tool will slide in nicely to lock the crankshaft at TDC no 1 cylinder.
remove the belt, tensioner and idler pulleys; also the water pump if this is to be changed (recommended)
Begin reassembly by replacing the water pump. It should come with a new O ring.
Lubricate the "O" ring with a little silicone grease and slip it onto the pump, ensuring it sits right at the bottom, against the flange. Clean the aperture in the block and install the new water pump, ensuring it goes in easily and sits fully square. Replace the two fixings, ensuring the 12mm standoff stud goes at the top. Tighten the bolts only moderately and evenly, otherwise there is a risk of distorting the pump body and risking leaks.
I managed to mess up the water pump as it went in askew and sadly I tightened it up and bent it out of shape. It is just possible to see that it is out of line in this view. Rushed off to buy a replacement and fitted (carefully and accurately) in ten seconds. Maybe you can teach an old dog new tricks but sadly this old dog forgot all the old tricks!
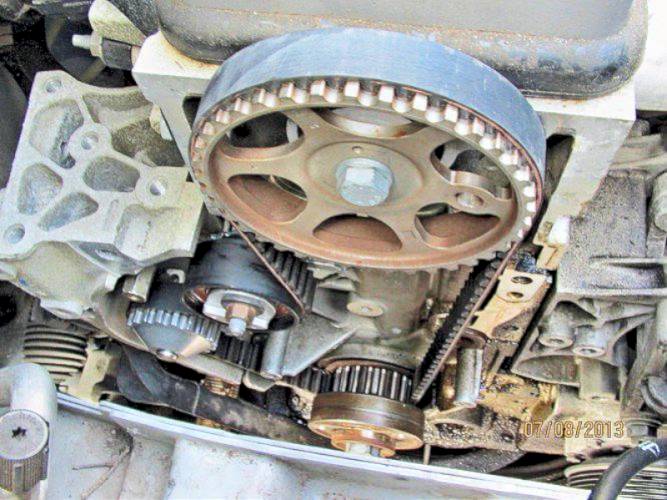
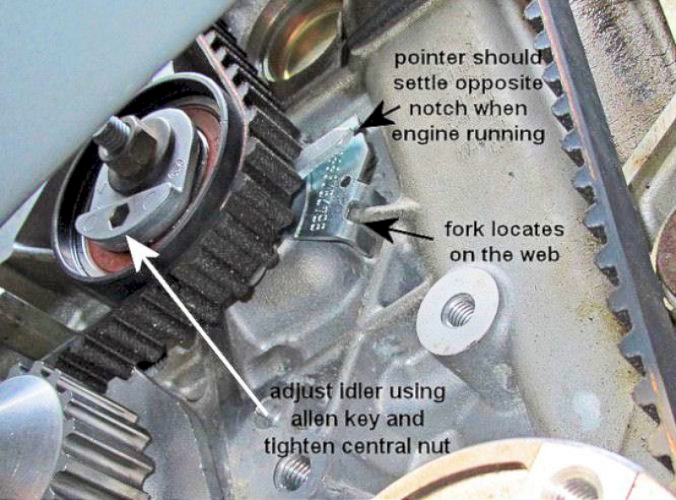
Fit the new eccentric tensioner and do the 13mm retaining nut up loosely so that the tensioner can still easily rotate. Note that it should be positively located on one of the webs of the engine casting; not obvious.
Install the new cambelt, taking care not to allow any oil on it and observing the directional arrows (the engine runs clockwise).
Start at the crankshaft sprocket and ensure the front run of the belt between the crank and cam sprockets is pulled very tightly otherwise your timing will end up a tooth out. I find it best to engage the teeth into the crank sprocket and then pull the belt tightly up to the cam sprocket and engage the teeth around the cam sprocket before fitting the belt around the tensioner and water pump.
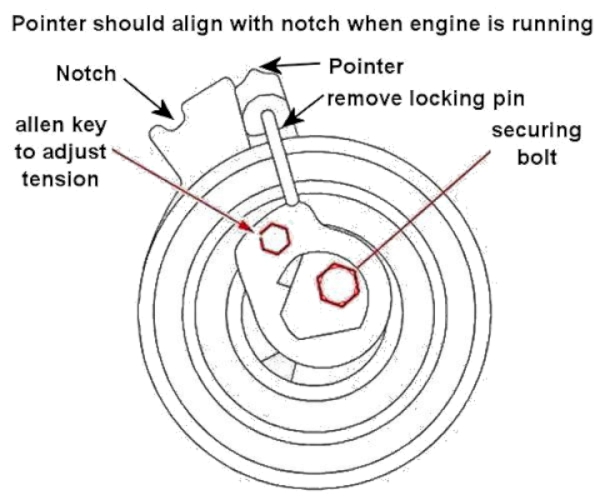
Remove the locking pin and set the tensioner (using an allen key in the tensioner) so the pointer lines up with the notch.
This ensures an accurate tension is maintained on the belt. Tighten the locking nut to maintain this setting.
Do check and recheck (by rotating the crankshaft an even number of times and pinning the crank and camshafts again) that nothing has slipped.
Then start the engine and it should run - keep fingers well out of the engine bay! Check that the tensioner pointer is still adjacent to the notch (there may be a small movement, but the pointer should remain close to the notch).
Run the engine up gently, listening for whines or other noises from the new cambelt. A whine suggests the tension is set too tightly. Stop immediately and recheck.
Refit the top and bottom belt covers and the engine mounting - followed by the crank pulley.
Refit the aux tensioner followed by the belt and run the engine again - keep fingers well out of the way!
Switch off and replace the mudshield and roadwheel.
Don't forget to replace the antifreeze if you have replaced the water pump.
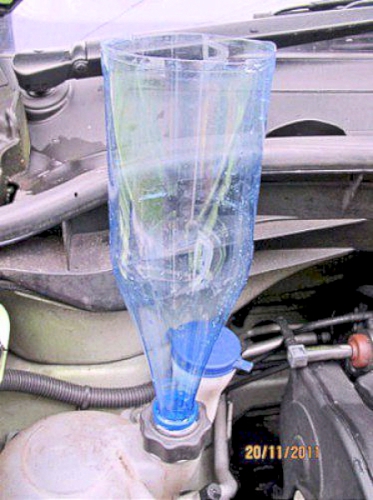
Take off the air filter assembly and refill the water reservoir - I used this device made up from an empty drinks bottle and old reservoir cap as you will need a head of water above the reservoir to fill the heater matrix.
There are two small bleed caps - on one of the heater pipes near the bulkhead and on the thermostat itself (picture shows allen key in place to slacken it off). Adjust the heater to supply maximum heat to ensure the heater valve is open, but keep the fan very low or the engine will never warm up!
Fill the reservoir, start the engine and remove the bleed caps one at a time. Close the caps when there are no more air bubbles coming out. Keep filling the filler until the reservoir is up to the full mark and allow the engine to run up to temperature; recheck the reservoir level and that there are no leaks. It can take a while to bleed so be patient and check after the first (very short) run.
VERDICT on low-mileage car:
at 26,000 miles (but 8 years, remember) the cam belt was in perfect condition - it looked almost new. However the tensioner pulley was slightly stiff to rotate. The water pump was slightly lumpy and clearly needed replacing as a precaution.
in addition, the aux belt was showing signs of wear and the aux idler pulley had lost its grease and was slightly loose and rattly
the assembly might have run to 30,000 miles, however the condition of the two idlers and the water pump would have caused increasing concern.
VERDICT on high-mileage car:
The second (yellow) car at 78,500 miles and 8 years: The cam belt was still in good condition, though had stretched so the tensioner was well beyond the normal operating position. The water pump was even but a little stiff and the idler had lost its grease though spun OK.
in addition, the aux belt was showing signs of wear and the aux idler pulley was slightly loose but was not replaced.
the assembly might have run further, however the stretched belt, condition of the idler and the water pump would have caused increasing concern.